This post is also available in:
![]()
Who is behind AB3D and why am I doing all that?
My name as Alex. A few year ago I took my first steps in 3D printing and CAD design for 3D printing and with the time I got deeper and deeper into it.
What is AB3D about?
With this blog I want to share my experience and fascination for the whole topic with you and I hope I am able to inspire you to either create your own stuff with 3D printing or to get into 3D printing yourself.
How it all started
It all started back in 2015, when I ordered my first DIY Prusa Kit from China. When I saw all the pieces of the printer in front of me, I wasn’t that sure anymore whether this was a good idea or not.
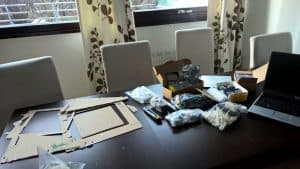
While putting together the parts I also got my first hands on experience with soldering, electronics and motor controllers and stuff. And with that, I made my first steps. Not in 3d printing, but in DIY and electronics.
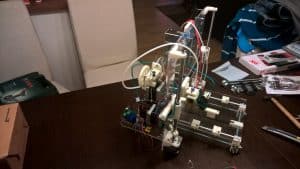
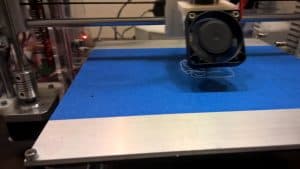
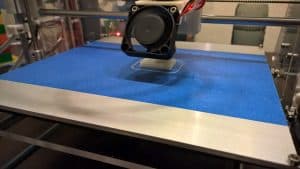
Even if I struggled several times and thought about giving up, in the end everything turned out to be fine. I was totally proud of myself when the first centimeters of molted plastics were extruded from the hotend of the printer. Ok, the printed object was a complete mess, but hey, it’s printing!
But I got a slightly dissapointed quite quickly. There is no take a model, send it to the printer and you’re done, like you know it from tools like Word or Excel or so. That’s not the way how 3D printers work. There are several steps to be done before every print and to be honest, I haven’t been aware of that when I started. But that couldn’t stop me. By the time, just downloading and printing 3D modells form the internet, wasn’t that satisfying. Especially, as most of the objects either doesn’t look was I wanted the to look like or the simply doesn’t fit my needs. So, I quickly realized that the next step to take was getting into CAD design.
But then…
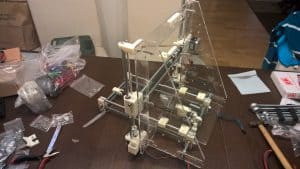
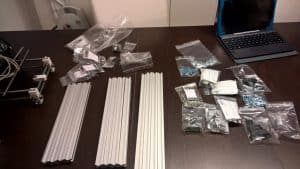
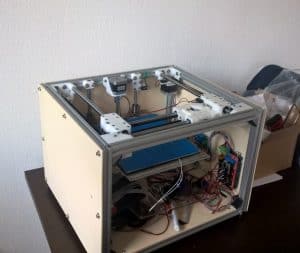
After some prints I noticed that the bigger the models get, the models started warping. But not from the bottom, which would be a normal issue with bad bed adhesion. No, the higher the object got during the printing process, the more is kind of twisted or so in one of the corners. It took me a bit until I found out, that the problem was the acrylic frame of the printer. The higher the printing header moved up on the Z axis, the more the frame started to bend when the printing header moved along the X axis. That’s a print damn problem. I tried to get the frame more sturdy with several measures, but no matter what I did, it didn’t work. But as giving up wasn’t an option, I decided I need a new printer. And as I already had all the electronic parts necessary to build and run a printer, and all I needed were the mechanical parts, I decided to again built the printer myself. And after googling around and spending hours of research, I decided to order the parts to build a Sparkcube.
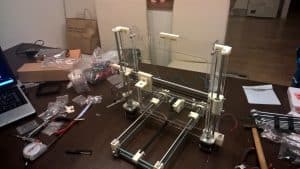
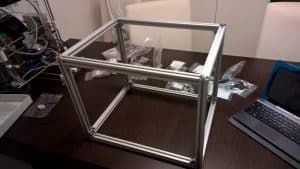
This time the building process were rather unspectacular.
The printer was doing a good job and some of the projects on this site have been printed with it. But I quickly realized that the components of the Chinese printer where of really bad quality and especially in the beginning when 3D printing became a thing at home, the progress of newer and better compontens was insanely high. And the print quality of fully assembled 3D printers got better and better and most of the DIY printers could keep the pace. Especially the printers which cheap components. And as I started to print my first orders on 3d hubs, I had to find a solution for that problem. To be honest, the customers were totally fine with the results, but maybe they had nothing to compare with. But moreover I wasn’t really satisfied with what I delivered to my customers. And another thing was, that the build volume of my printer was rather small and so I wasn’t in the list of printing services for a lot of prints on 3dhubs. So I had to make a choice:
- keep everything as it is and deliver quality I wasn’t happy with,
- buy parts to make the printer bigger (and better), which basically meant to more or less build a new printer, or
- buy a fully assembled printer.
I did my reseach again, a the common opinion was, you won’t reach the printing quality of ready made, fully assembled printers with a DIY printer, if you do not invest a huge amount of time. And even then it is quite difficult. So, as my intend was to be serious printing service, the answer was easy. I’ve got to buy a new printer. Again. But this time, no DIY. Even if I loved to assemble it and I learned a lot of it.
And now, this is it.
After several long nights of researching, what fit into my budget, I decided to buy a Flashforge Dreamer.
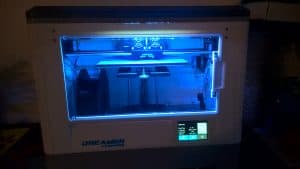
The first results were…WOW. I don’t know what else to say. The difference in the printing quality was incredible. Yes, there still was the crying me, as I really enjoyed building the other printers myself and as said, I learned so much form building them, but I didn’t doubt the decision to buy the Dreamer. The old printer is not disassembled and I have some ideas what to do with it, but this is another story to be told.
Last but not least
Well, as this part of the site got longer the it was intended to be, I wish you lot of fun reading the post and I hope they are inspiring you in the one or the other way. If you need something printed, I’ll appreciate if you us my 3d printing service. If you have questions, don’t hesitate getting in contact with me.
Regards Alex