This post is also available in:
![]()
Depending on the print object or the filament used, it is sometimes necessary to use a nozzle with a larger diameter or made of a different material. But especially if you are relatively new to 3D printing and have never done a nozzle change before, this step is a bit of an inhibition for some. In this guide I explain step by step what you have to do and what you have to pay attention to.
This guide focuses on changing the nozzle of a Prusa Mini. In most cases, the procedure described here is largely identical for other printers. The biggest difference is usually that you may need to remove some additional cover, or due to a different nozzle type, you may need a different size wrench.
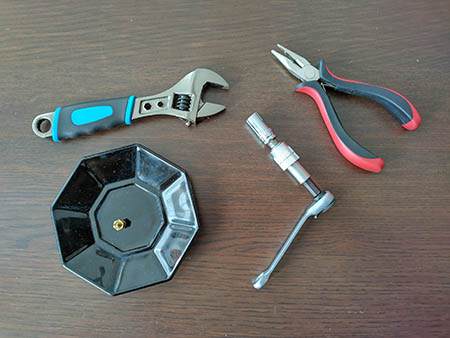
You will need the following materials for a nozzle change:
- adjustable wrench or a 16 mm – wrench
- A ratchet with a 7 mm nut or an adequate open-end wrench
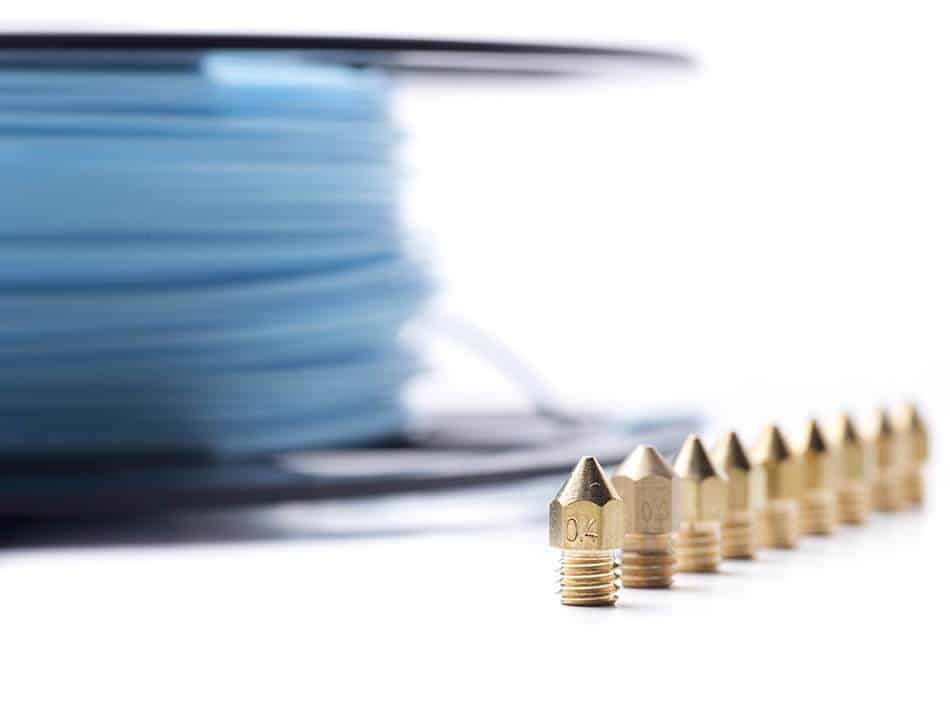
- Nozzle of appropriate size or material
- a pair of spraying pliers
Preparation
As always when you rebuild anything, you should have everything ready beforehand and check that the tools you need but also the nozzle to be used are in good condition. Nothing is more annoying than starting work and then realizing that something is missing or defective and you either have to interrupt your work or, in the worst case, even undo everything.
It is also important that you have enough space to work. You are working here with a hot end of up to 280°C. Too little space can lead to severe and painful burns.
Another step in the preparation is to remove everything that is not absolutely necessary or everything that makes it difficult for you to access the nozzle. These include things like:
- Silicone protection for the heat block
- possibly obstructive covers of the hotend
- Cameras, if available
Filament unload
Once all the necessary tools and materials are prepared, the first step is to heat up your print head and unload any material that may be in the printer.
If you have not used the 3D printer before, there should ideally be no material loaded anyway. Depending on the filament, it may otherwise break somewhere in the area of the material supply and you will have to disassemble other parts of the 3D printer.
Heat up nozzle
The next step is to preheat the nozzle to 260-280 °C. Prusa is unfortunately not entirely consistent in his descriptions here himself. In one place 280-285 °C is specified, in another 260-280 °C is recommended. In my personal experience, 260 °C is quite sufficient.
Attention! If you want to change to a current Olsen Ruby nozzle, please follow the instructions in the official manual.
However, the nozzle should never be changed when cold, as there is no clean interlock between the heatbreak, heatblock and nozzle and, in the worst case, this can cause a material jam in the transition between the heatbreak and nozzle.

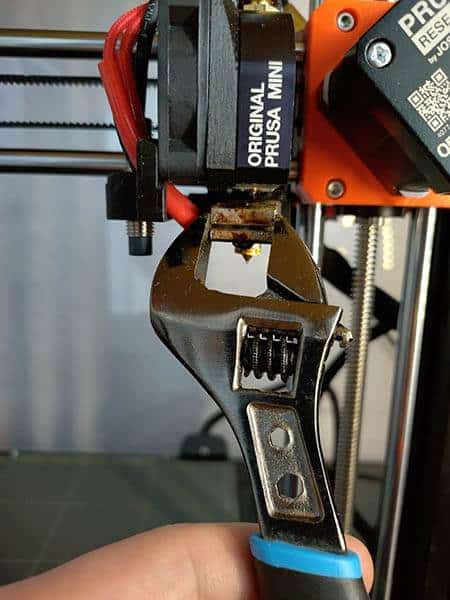
Remove nozzle
Hold the heat block with the wrench and remove the nozzle with the ratchet by turning it clockwise.
Then place the hot nozzle on an object that can withstand the temperatures of the nozzle. I usually just use a porcelain saucer for this.
If the nozzle does not fall out of the ratchet nut on its own due to heated filament residue, try pulling the nozzle with needle-nose pliers or, if that is possible, push the nozzle out from the opposite side. If you remove the nozzle with pliers, you must proceed with appropriate caution. Brass, the material most nozzles are made of, softens at high temperatures and by applying too much pressure you can damage the thread of the nozzle with needle nose pliers.
Either way, pay close attention when removing. The nut is also quite hot due to contact with the hot nozzle and this can cause burns.
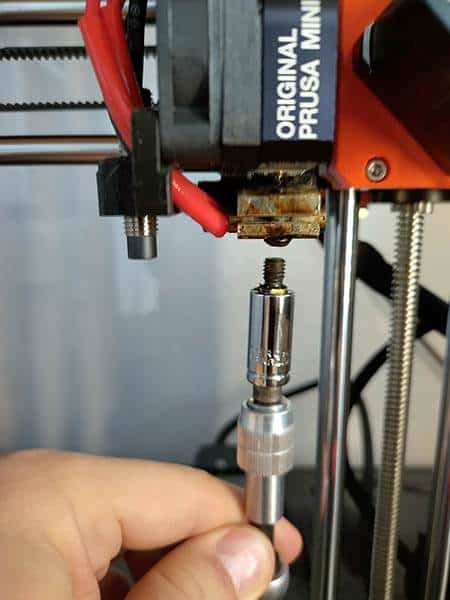
Inserting the new nozzle
When inserting, you basically do the opposite of removing. Hold the heat block with the wrench and turn the nozzle counterclockwise back into the heat block.
If you notice that the nozzle is tightened without much effort and the heat block is not aligned straight, loosen the nozzle again very slightly by about a quarter turn and align the heat block accordingly with the wrench. If there is still a little play, you can tighten the nozzle again without using too much force. This presses the heatbreak and the nozzle against each other accordingly and locks them in the heatblock.
Three things are important when inserting the nozzle:
- When attaching the nozzle to the thread, make sure that the nozzle does not jam. If you apply the nozzle at an angle, you can damage the threads of the nozzle or even the heat block. If you notice an unusually high resistance when screwing in the nozzle at the beginning, it is better to re-screw the nozzle.
- If you were able to screw the nozzle into the heat block, don’t over tighten. By applying too much force, you can, in the worst case, tear off the thread of the nozzle. Then, in the worst case, you will have to replace both the nozzle and the heat block.
Again, if you don’t tighten the nozzle enough, the nozzle and heatbreak may not lock properly and material may leak between the nozzle and heatblock during the next print job. As a result, residues of burnt material may be found in your print object or a material jam may occur in the heat block. - Make sure that there is a small gap between the heat block and the nozzle after tightening. This gap means that you lock the nozzle against the heatbreak.
If the nozzle were to rest against the heatblock without a gap, there is a risk that the nozzle in the heatblock would not lock against the heatbreak. In the worst case, this distance between the heatbreak and the nozzle could lead to clogging of the entire hotend.
To fix this problem, you need to screw the heatbreak further into the heatblock. To do this, screw the heat block slightly counterclockwise onto the heatbreak and then tighten the nozzle.
Calibrating the print bed
For example, if you change from a new E3D v6 nozzle with 0.4 mm to a new E3D v6 nozzle with 0.6 mm diameter, the distance should usually not change and calibration is not always absolutely necessary. Of course, this only applies if you do not have to use a different print bed due to different material.
If you change from an old nozzle to a new nozzle or vice versa, you should definitely perform a calibration. An old nozzle may already be slightly worn, as described in this article, which in turn may also affect the adhesion of the first layer.
Thermal Runaway Error when changing nozzles
From time to time, the printer may detect a Thermal Runaway error near the end of the nozzle change and prompt for a restart by the user. There is basically nothing else bad happening here. The printer’s firmware simply detected an abnormal temperature drop during heating and aborted the heating process for safety reasons.
The error occurs mainly when using massive wrenches, such as the adjustable wrench used in this article. Since the solid wrench does not heat up so quickly, it may happen that after some time a temperature drop of more than 20°C is measured during the temperature measurement. In this case, a so-called thermal runaway is detected by the firmware and the heating process is aborted. The error condition can only be corrected by restarting the printer.
What if the nozzle breaks off?
If you tighten the nozzle too much when inserting it, especially brass nozzles, the worst case scenario is that you may tear the nozzle off. This happens because brass softens very early due to its comparatively low melting temperature.
How do you get the torn off piece of the nozzle out of the heatblock now? To remove the torn off piece of the nozzle from the heatblock, you will need to unscrew this piece from the heatblock using a Schraubenausdreher. This is usually only possible by completely disassembling the heatbock. Then clamp the heat block in a vice and try to turn the torn off piece out of the heat block with the Schraubenausdreher. It is also helpful if you warm up the heat block a little with a hot air blower.
If you cannot remove the remains of the nozzle from the heat block, you will have to replace the entire heat block.
NOTE!
I have mentioned and linked some materials, tools and the like in this article. All these and other products that I can recommend without a guilty conscience, I have summarized for you in my recommended products. These are affiliate links and for each purchase through these links I get a small compensation from the respective merchant. If the various articles on the site have helped you and you would like to support this blog, I would be very happy if you use these affiliate links when you shop. Thank you very much.